|
Friendly Cyber Cafe SoftwareDocumentation |
Setup. Step-by-step guide
Setup. Step-by-step guide for thin clients (NComputing, etc.)
Known issues
Upgrade to new version
Setup. Step-by-step Guide
1. Install Server
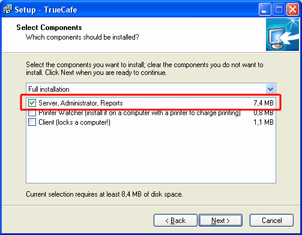
Run TrueCafe installation program on your server/operator computer. Select the Server option to install the server components:
2. Run TrueCafe
Start TrueCafe: Windows Start > TrueCafe > TrueCafe
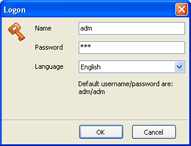
Use the default login/password = adm/adm:
3. Install Client
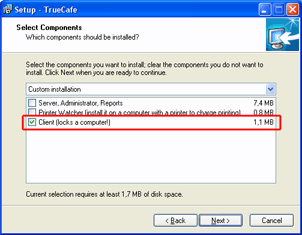
Run TrueCafe installation program on your terminal computer(s). Select the Client option to install the client components:
4. Connect Client to Server
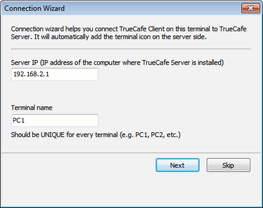
Run TrueCafe Client when the installation ends or restart your computer and TrueCafe Client will start automatically. The first time it starts it displays the Connection wizard window:
Server IP: type IP address or host name of your server computer (a computer where TrueCafe Server software is installed).
Terminal name: Specify a unique terminal name.
Press the Next button and if you have specified your Server IP address correctly, TrueCafe adds the terminal icon on your server side.
If you get Network error 10061, try disabling your firewalls on both server and terminal sides, or add TrueCafeServer.exe program to your firewall exception list on the server side.
5. Login on Terminal
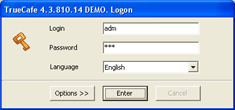
When you start your terminal computer, TrueCafe Client automatically starts, locks the terminal screen and displays the login window:
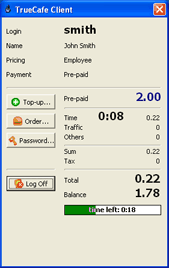
Use a customer login/password to start a session, e.g. your default administrative account - login/password = adm/adm. TrueCafe Client unlocks the screen and displays the session info window:
If you need to unlock your terminal screen (close down TrueCafe Client program), you have to leave login empty, type password = closetruecafe and press Enter.
What's next?
You could also create pre-paid tickets
or setup your pricing
or get to know more about
Copyright © 1999-2013 TrueCafe, Ltd.
All rights reserved.
