|
Friendly Cyber Cafe SoftwareDocumentation |
Step-by-step Wireless Billing Setup
on Windows 7
Introduction
This article demonstrates how to setup a very simple Wi-Fi billing approach. You need the following hardware:
1. A server computer which is connected to the Internet (e.g. via ADSL modem).
2. An extra LAN (Ethernet) card.
3. Wireless router (Linksys WRT54G, D-Link DIR-300, etc.)
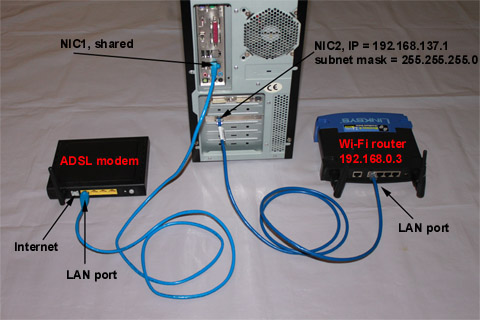
The idea is to make your server computer your Internet gateway computer, which means the computer with TrueCafe Server installed is located between your ADSL router and Wi-Fi router:
1. Plug in extra Ethernet card
Plug in your extra Ethernet card into your server PCI slot and let Windows detects the card and install the corresponding network card driver.
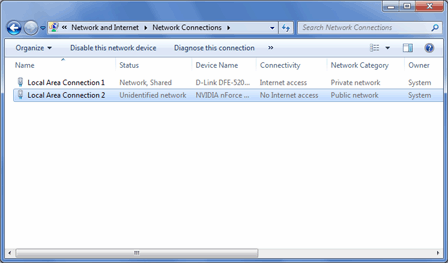
In this example Local Area Connection 1 (NIC1) is a primary card connected to the ADSL modem and Local Area Connection 2 (NIC2) is an extra network card:
Windows Control Panel > Network and Internet > Network and Sharing Center > Change adapter settings (on the left)
2. Enable Internet Connection Sharing
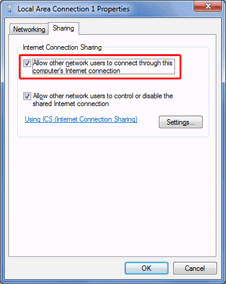
Open your NIC1 properties and enable Internet Connection Sharing.
Windows setup the following NIC2 properties:
IP address = 192.168.137.1
Subnet mask = 255.255.255.0
You should not change these values because Internet Connection Sharing may stop working.
2.A. What if you don't like Internet Connection Sharing
If you think that Internet Connection Sharing is not OK for you, you could try some other alternative Windows routing software. We recommend using NAT32 since many our clients use it and it proves to work well with TrueCafe.
3. Setup Wi-Fi router
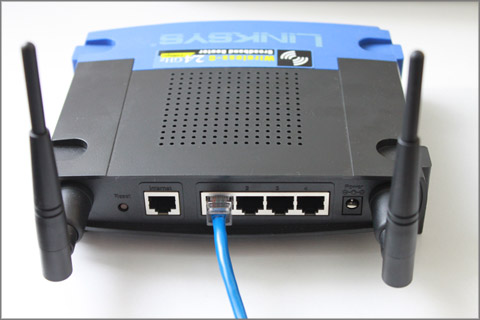
Connect your NIC2 with a cable to your router LAN port (not Internet port):
Set the router IP address = 192.168.0.3. Switch the router into Access Point mode. Disable router DHCP.
Read more on how to setup your router model:
Linksys router setup (WRT54GL)
4. Connect Wi-Fi laptop
Connect your Wi-Fi laptop to your wireless network and make sure that you can surf the web.
5. Setup TrueCafe Server
Install TrueCafe on your server computer.
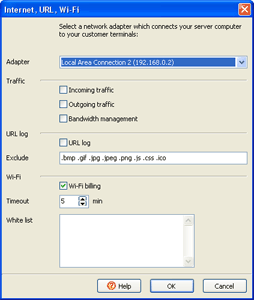
Open TrueCafe main menu > Tools > Internet..., select your NIC2 and enable the Wi-Fi billing option:
6. Login Wi-Fi laptop
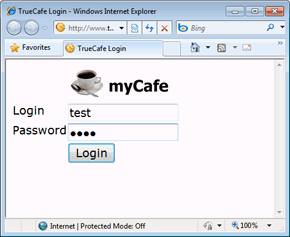
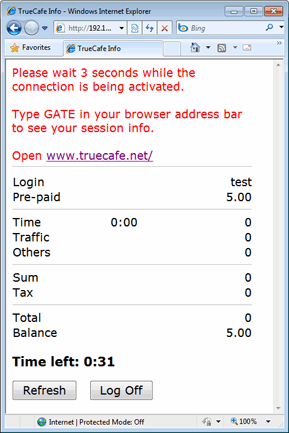
Try opening any website from your Wi-Fi laptop and get TrueCafe login page. Type your customer/ticket login/password to start a session and continue browsing the web. Try login/password = test/test by default.
TrueCafe. Friendly Internet Cafe Software
Copyright © 1999-2012 TrueCafe, Ltd.
All rights reserved.
